Hydraulic disc brakes are prized for their strong, smooth stopping power – but even these systems can be improved. This guide provides advice on hydraulic brake modifications for DIY enthusiasts looking to boost braking performance on bikes and e-bikes. We’ll cover common upgrades (like larger rotors, better pads, and 4-piston calipers) as well as tips to install and maintain these modifications safely. Whether you’re converting from mechanical brakes or tweaking an existing hydraulic setup, the following sections will help you enhance your bike’s braking power, control, and reliability.

Quick Summary of Brake Modification Tips
- Upgrade to Hydraulic Discs: If your bike has mechanical brakes, switching to full hydraulic disc brakes provides stronger, more consistent stopping with less maintenance. Hydraulic systems apply force more smoothly than cables, improving control in all conditions.
- Install Larger Rotors: Upsizing your brake rotors (e.g. from 160mm to 180mm or 203mm) boosts braking torque and heat dissipation for long descents. E-bikes often benefit from bigger, high-quality rotors to handle their extra weight and speed. Be sure your frame/fork can fit the larger diameter.
- Use High-Performance Pads: Swapping stock brake pads for a better compound can increase bite. For example, replacing organic pads with metallic pads yields more fade-resistant power on downhills. Semi-metallic pads offer a balance of strong braking and low noise. Always bed in new pads and rotors properly for best results.
- Upgrade Calipers (4-Piston): Many stock brakes have 2-piston calipers; moving up to 4-piston calipers greatly increases clamping force and heat capacity. Four pistons spread force over more pad area, giving noticeably higher stopping power than two-piston units. This helps heavy or high-speed bikes stop safer, especially on steep terrain.
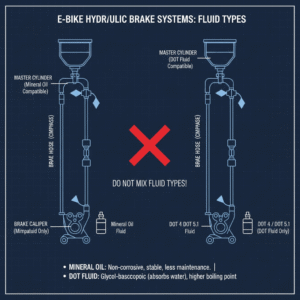
- Maintain Compatibility: When modifying brakes, ensure all parts are compatible. Match your rotor size to caliper and frame specs (adapter brackets may be needed). Use the correct brake fluid type (mineral oil vs. DOT) specified by your brake manufacturer – never mix fluids, as using the wrong type can damage seals. Proper bleeding and adjustment after any modification are crucial for safety.
Why Consider Hydraulic Brake Modifications?
Upgrading or modifying your brake system can dramatically improve your riding confidence and safety. Hydraulic brakes already offer better stopping power and smoother control than mechanical brakes, but there are reasons to tune them further. For one, every rider’s needs are different – a commuter might want more braking force for city traffic, while an eMTB rider may need better heat management on long downhill runs. Heavier, faster electric bikes in particular put extra demand on brakes, often necessitating more powerful components (stronger calipers, larger rotors) to ensure reliable stopping. By making strategic modifications, you can adapt your bike’s braking to your usage: for example, adding power and fade-resistance for steep mountain rides, or simply reducing maintenance needs for daily commuting. The goal is a braking system that inspires trust – knowing you can stop quickly and predictably when it counts.
From a DIY perspective, hydraulic brake modifications are a popular project because they offer a high impact on performance. Swapping to improved parts (like bigger rotors or sintered pads) is relatively straightforward and yields immediate benefits. Even a modest upgrade can shorten braking distances and improve modulation (fine control of brake force). In the following sections, we break down common brake upgrades – what they involve and how they help – so you can decide which modifications make sense for your bike.
Common Hydraulic Brake Modifications
Converting Mechanical Brakes to Hydraulic Discs
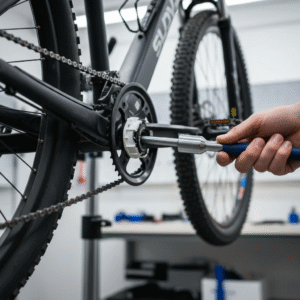
One of the most significant upgrades is converting cable-operated brakes (mechanical discs or rim brakes) to a full hydraulic disc brake system. This modification replaces the cable levers, cables, and calipers with hydraulic brake levers, hoses, and calipers. The result is a dramatic boost in braking power and consistency – hydraulic systems self-adjust and don’t suffer cable stretch, giving a firm, responsive lever feel. Many e-bike riders find this upgrade transformative for handling higher speeds. Conversion kits are available that include levers, calipers, hoses, and often new rotors. For example, Tektro’s E-350 kit is popular for e-bikes because it comes with built-in motor cutoff sensors in the levers, maintaining safety features. When converting, ensure the kit fits your bike’s brake mounts and rotor size. You’ll need to remove the old brakes, mount the new hydraulic calipers to the frame/fork, install the new levers on the bar, and route the hoses neatly (following the original cable routing). After installation, bleed the brakes to remove any air bubbles (some kits come pre-bled) and test for firm lever feel. This conversion yields smoother operation and stronger braking, especially noticeable in wet conditions or steep descents. It’s one of the best modifications for a DIY enthusiast seeking a big performance jump from stock mechanical brakes.
Increasing Rotor Size for More Stopping Power

A larger 203 mm disc rotor installed on a mountain bike. Upgrading to bigger rotors increases braking leverage and improves heat dissipation, which is especially helpful for heavy e-bikes or steep downhill riding.
Upgrading your brake rotors to a larger diameter is a quick way to get more braking force. The rotor acts as a lever arm for the caliper – a bigger rotor gives the brake pads more leverage to slow the wheel. Common sizes are 160 mm (stock on many bikes), 180 mm, 203 mm, and even 220 mm for extreme cases. Jumping up even one size can yield a noticeable improvement in stopping power and reduce brake fade on long descents. Larger rotors also run cooler because they have more mass and surface area to absorb and dissipate heat. For example, moving from a 160 mm to 203 mm rotor provides better braking performance and heat management during extended downhill braking. This is why e-bikes, which are heavier and can maintain higher speeds, often come with or benefit from 180 mm+ rotors.
When performing this mod, you’ll likely need a caliper adapter bracket to reposition the brake caliper for the larger rotor radius. These adapters are inexpensive and correspond to the rotor increase (e.g. a +20 mm post-mount adapter to go from 160 to 180). Ensure your frame and fork have clearance for the bigger rotor – most modern MTB and e-bike forks can fit up to 203 mm easily, but it’s good to double-check manufacturer specs. Also be aware that larger rotors add a bit of weight, though typically the trade-off is worth it for the performance gain. After installing new rotors, bed them in with the pads by doing a series of gradual stops, which lays down an even pad material layer on the rotor for optimal bite. Keep in mind that very large rotors can make brakes feel more “grabby” (less modulation), meaning they achieve full power with less lever pull. Most riders find 180 or 203 mm strikes a good balance of power and control. Overall, upsizing rotors is a relatively easy mod that yields stronger braking, less heat-induced fade, and more confidence on steep or fast rides.
Upgrading to High-Performance Brake Pads

Brake pads play a crucial role in braking characteristics. Upgrading your pads can improve both initial bite and fade resistance. There are three main pad compounds: organic (resin), semi-metallic, and sintered metallic. Many stock brakes (especially on entry-level bikes) come with organic pads – these are made of resin material, which offers quiet operation and good modulation but can overheat and wear quickly under heavy use. Simply switching to metallic pads (made of sintered metal) can give you a “free” performance boost: metallic pads tolerate higher temperatures without fading and usually increase braking power, at the cost of a bit more noise and rotor wear. For instance, if your bike currently has organic pads, swapping them for metallic pads will slightly increase your braking power on long descents. Semi-metallic pads blend the two extremes, offering a compromise of durability, noise, and modulation.
When choosing pads, ensure they are the correct shape/model for your caliper. Many brake manufacturers also offer “e-bike” rated pads, which are often sintered or have a higher heat capacity, recognizing the greater stresses of stopping heavier bikes. Whatever pad you choose, always replace pads in pairs (left and right of the caliper) and break them in with your rotors. The bedding-in process involves multiple slow-speed stops to gradually transfer pad material to the rotor surface. Skipping this process can result in glazed pads or squeaky, weak brakes. Another tip: keep your rotors clean (use isopropyl alcohol to wipe them) when installing new pads to avoid contaminating the pads with oils or grease. Overall, performance pads are an affordable modification – they can sharpen your brake response and maintain effective stopping on long rides where stock pads might fade.
Switching to 4-Piston Brake Calipers

If your current hydraulic brakes use two pistons per caliper (one on each side of the rotor), upgrading to a 4-piston caliper design can substantially boost stopping power. 4-piston brakes have two pistons pushing each pad, for four pistons total, which increases the clamping force and contact area on the rotor. In practical terms, “4-pot” brakes provide stronger braking force, better heat dissipation, and often improved modulation compared to 2-piston models. The additional pistons spread out the pressure on larger brake pads, so you get more friction without needing a larger single piston. As a result, four piston brakes naturally have more stopping power than two piston brakes, and they resist brake fade on long descents more effectively due to their greater fluid volume and pad size. This upgrade is especially helpful if you do a lot of steep downhill riding, carry heavy loads, or simply find your current brakes lacking bite. Many eMTB riders opt for a 4-piston front caliper to handle the brunt of braking force where it’s needed most.
Converting to 4-piston calipers usually means buying a new brake set (caliper + lever) from a higher-tier model in your brake manufacturer’s lineup, or an equivalent aftermarket model. For example, Shimano’s 4-piston brakes (like Deore XT 8120 or SLX 7120 series) are direct upgrades over their 2-piston versions, fitting the same mounts but delivering more power. SRAM’s Code series is a popular 4-piston choice for heavy-duty use. Installation involves unbolting your old caliper and mounting the new one in its place (sometimes you may need a different adapter if rotor size changed). You’ll also mount the matching lever and bleed the system. Ensure the new caliper’s piston clearance is adjusted for your rotors. Once installed, you’ll likely notice a more forceful stop with the same lever effort. Modulation (the ability to finely control braking force) can also improve, since having four smaller pistons often gives a more progressive feel than two larger pistons. The only downsides to 4-piston brakes are slightly higher weight and cost, but for most riders the trade-off is well worth the significantly enhanced braking confidence.
Upgrading Brake Levers and Adjustability
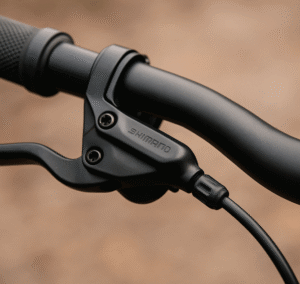
Brake levers (and the attached master cylinder in a hydraulic system) can affect brake feel and tunability. Upgrading your brake levers or master cylinders can be a worthwhile modification if you desire a different ergonomic feel or more adjustment features. Higher-end brake levers often have built-in controls like reach adjustment (to move the lever closer or farther from the bar to fit your hand) and bite-point adjustment (also called free stroke or contact point adjustment, which lets you fine-tune how far the lever travels before the pads engage). For example, SRAM’s Code RSC levers include a knob to adjust the pad contact point on the fly, allowing riders to dial in the “bite” to their preference. This can make a big difference for comfort and control, especially if you have smaller hands or prefer your brakes to engage earlier/later.
Upgrading levers usually goes hand-in-hand with caliper upgrades, as they’re sold as a set. However, some systems allow mix-and-match – for instance, you might pair a more advanced lever with an existing caliper if within the same brand/family. A stiffer or more precise master cylinder can also improve modulation. When installing new levers, you’ll need to swap the units on the handlebars and reconnect/bleed the hydraulic lines. Be sure to position the levers for comfortable one-finger braking; many riders angle them slightly downward in line with their arm position. If your new levers have adjustable reach, set it so your index finger rests naturally on the lever’s hook. Small tweaks here can reduce hand fatigue and improve reaction time. In summary, better brake levers won’t directly increase raw stopping power like bigger rotors or calipers do, but they enhance your control and comfort, which lets you use your brakes more effectively. Don’t overlook the human element of braking – a well-positioned, high-quality lever can give you a confidence boost when modulating your speed.
Brake Fluid and Hose Improvements
The hydraulic fluid and hoses in your brake system are also areas for potential modification, mostly in the context of maintenance or specific performance needs. All hydraulic brakes use either DOT fluid or mineral oil as the brake medium. While you cannot change a given brake from one type to the other (the seal materials are designed for a specific fluid), you can ensure you’re using the highest suitable grade of fluid. For instance, if your brakes use DOT fluid, a switch from DOT4 to DOT5.1 can raise the boiling point (DOT5.1 has a higher dry/wet boiling point), which is beneficial for heavy braking use. Always use the fluid type your manufacturer specifies – mixing the wrong fluid can ruin your brake’s seals and components. Mineral oil systems should only be filled with the brand’s recommended oil (e.g., Shimano, Magura, etc., each have their own formulas) to avoid any additives that might not be compatible. Regular fluid replacement or bleeding (about annually, or when brakes feel “spongy”) is itself a key maintenance modification that keeps your brakes performing like new by removing air and moisture.
Upgrading brake hoses is another niche modification. Stock hoses are usually rubber or polymer that are perfectly adequate, but some riders opt for steel-braided hydraulic hoses for improved durability and a firmer lever feel (due to slightly less expansion under pressure). This is more common in motorcycle brakes but is available for bicycles too. If you’re experiencing soft lever feel even after proper bleeding, and caliper/pads are in good shape, higher quality hoses might help. Whenever replacing hoses, make sure to cut them cleanly and install the correct barb/olive fittings securely – a leak or loose fitting can cause sudden brake failure. It’s also critical to route and secure hoses properly along the frame to prevent snags or kinks. In summary, fluid and hose tweaks are about reliability and feel. Using fresh, correct fluid and quality hoses ensures your hydraulic pressure is transmitted efficiently, giving you consistent braking performance when you squeeze the lever.
Integrating Motor Cut-Off Sensors (For E-Bikes)
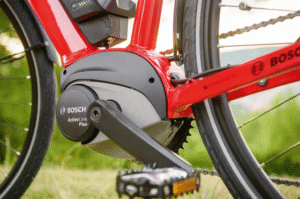
For electric bike riders, one unique consideration in brake modifications is the motor cut-off sensor. E-bikes often have brake levers with built-in electrical switches that cut power to the motor when you pull the brake. This is an important safety feature to prevent the motor from pushing against the brake or to instantly disengage cruise or throttle when you need to stop. If you are upgrading an e-bike from mechanical to hydraulic brakes, you’ll want to maintain this cut-off functionality. Some hydraulic brake sets are made specifically for e-bikes and include wired sensors in the levers (for example, certain Tektro and Magura e-bike brake models include this). Using those makes it a plug-and-play solution.
If your chosen hydraulic kit doesn’t have built-in sensors, you have a couple of options. One is to add external brake sensors: these are small sensor modules that can be attached to the new lever or cable, and connected to your e-bike’s control system. They detect brake movement (often magnetically) and signal the motor to cut power. It can take some tinkering to mount and align these correctly. Another method some DIYers use is repurposing the existing sensor wiring – for instance, carefully removing the sensor switch from the old lever and mounting it near the new lever, or wiring the old connector to a new sensor. Compatibility is key: ensure the sensor type (often hall effect or simple contact switch) matches your e-bike system’s requirements. For example, Bafang-based setups often allow running without brake sensors, but it’s much safer to have them operational.
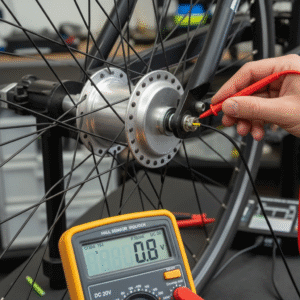
When installing or testing new brake cut-off sensors, do so with the bike powered on but wheels off the ground. Spin the wheel and pull the brake to see if motor power immediately cuts – many displays also show a brake icon when activated. Adjust the sensor position if needed to get reliable activation. Maintaining the motor cut-off in your brake upgrade ensures you don’t accidentally have the motor fighting your brakes – an important detail for safety. It’s an extra step in e-bike brake mods, but well worth the peace of mind knowing that any time you hit the brakes, the motor assist will cease as intended.
Considering Cable-Actuated Hydraulic Calipers
If a full hydraulic conversion isn’t feasible or you prefer to keep things simple, a halfway modification is to use cable-actuated hydraulic calipers. These hybrid systems (offered by brands like TRP, Yokozuna, and Juin Tech) allow you to retain your mechanical brake levers and cables, but replace the caliper with a hydraulic unit. The brake lever pulls a cable as usual, but the cable actuates a small hydraulic piston at the caliper, which then presses the pads. This design amplifies braking power and improves modulation compared to purely mechanical disc brakes. It’s a popular upgrade for road and gravel bikes with drop bars, and it’s applicable to e-bikes or MTBs as well for those who want better braking without rerouting hoses or changing levers.
Cable-hydraulic calipers can vastly improve your braking over stock mechanical calipers. Installation involves swapping the caliper and adjusting the cable tension – you typically use a short length of brake cable and housing from your lever to the new caliper (sometimes new compressionless housing is recommended for best performance). Bleeding is usually done at the factory, so maintenance is similar to normal hydraulics (you may eventually need to bleed these mini-hydros, but not as frequently as a full system since the fluid volume is small). Riders report that a good hybrid caliper plus compressionless cable housing yields excellent results, approaching the feel of full hydraulics. For example, one experienced user noted that by upgrading to cable-actuated hydraulic calipers, plus a larger 180 mm rotor and low-stretch brake cable, they got a significant boost in braking performance while keeping their existing levers.
Keep in mind that hybrid calipers still may not match the absolute power of top-end four-piston hydraulics, but they can be a big step up from basic cable discs. They are also easier to revert or service for someone not comfortable with full hydraulic maintenance. If you tried a hybrid caliper and want even more performance, that might confirm you’re ready for a complete hydraulic system – but many are perfectly satisfied with this in-between solution. It’s a testament to the flexibility of DIY modifications: you can mix and match components to find the right balance of performance, cost, and complexity that suits your needs.
DIY Installation and Safety Tips
Modifying brakes is a serious job – these are, after all, your bike’s most critical safety components. However, with careful attention to detail, a DIY brake upgrade can be done successfully. Here are some essential tips and considerations for hydraulic brake modifications:
- Ensure Compatibility: Verify that all new parts (calipers, rotors, adapters, levers, sensors) are compatible with your bike. Check mounting types (Post Mount vs IS mount), rotor size limits for your frame/fork, and whether your brake levers match your handlebar type. Using the wrong size rotor or mount can cause poor brake performance or even mechanical interference.
- Gather Proper Tools: You’ll typically need hex/Allen wrenches, a torque wrench (for caliper and rotor bolts), a brake bleeding kit, and possibly a cutter for hoses or cables. Having a bike repair stand can help a lot. Don’t improvise on tools like open flame for cutting hoses – use a proper hose cutter and insert barb fittings as instructed.
- Follow Manufacturer Procedures: For bleeding brakes and installing components, it’s wise to follow the brake manufacturer’s service manual or instructions. Use the specified brake fluid and bleed technique. For example, Shimano brakes require their mineral oil and a funnel system to bleed, while SRAM brakes use DOT fluid and syringe bleeding. Deviating or mixing fluids can cause seal damage and brake failure. Take your time to eliminate all air from the lines – spongy feeling brakes indicate air is still present and needs more bleeding.
- Apply Correct Torque: Always tighten mounting bolts to the recommended torque values. Caliper mounting bolts and rotor bolts should be snugged to spec (often around 6-8 Nm for calipers, 4-6 Nm for rotor bolts, but check your manual). Over-tightening can strip threads or warp components, while under-tightening is dangerous. Using a threadlocker (blue Loctite) on rotor bolts is often advised to prevent loosening.
- Center the Calipers: After mounting a new caliper or changing rotors/pads, you’ll need to center the caliper over the rotor. An easy method is to loosen the caliper bolts slightly, squeeze and hold the brake lever (this centers the caliper via the pad pressure), then tighten the bolts before releasing the lever. Spin the wheel to ensure there’s no rubbing; if there is, fine-tune the alignment or true a slightly bent rotor.
- Bed In New Pads/Rotors: Always perform a bed-in procedure with new brakes. This involves doing about 10-20 gradual stops from a moderate speed, letting the brakes cool a bit between each. Bedding-in deposits pad material onto the rotor evenly and greatly improves braking performance and noise levels. Skipping this can result in squealing or weak brakes until they eventually bed in during use (and with potential glazing).
- Test in a Safe Area: Before taking your upgraded brakes to steep hills or busy traffic, test them in a safe, controlled environment. Roll at low speed and do some hard stops to ensure everything is working correctly. Check that the motor cut-off engages on e-bikes (if applicable) by observing that the motor stops powering when brakes are applied. Make sure the lever feel is firm and consistent. If the brakes feel soft or fade quickly, re-bleed or look for issues like leaks or contaminated pads.
- Monitor and Maintain: After modifications, keep an eye (and ear) on your brakes during the first few rides. It’s not uncommon for new pads to wear in or for bolts to need a re-tightening check. Carry a multi-tool on your first ride post-upgrade in case minor adjustments are needed. Over the long term, maintain your modified brakes like any others – check pad wear regularly, keep rotors clean, and bleed the system on schedule. High-performance parts still need care to stay performing their best.
- Know When to Get Help: If at any point you feel unsure about a procedure (like cutting hoses or bleeding) or if the brakes aren’t working right after your installation, don’t hesitate to consult a professional bike mechanic. Brakes are too important to leave to chance. A mechanic can double-check your work or finish the job, ensuring you have safe brakes. There’s no shame in seeking help, and you can always learn from them for next time.
By following these guidelines, you’ll set yourself up for a successful brake modification project. Patience and precision are your friends – rushing a brake job or using a shoddy workaround can lead to dangerous failures. But done right, a DIY brake upgrade is extremely rewarding. You’ll feel the difference the first time you squeeze those levers and come to a quick, smooth stop knowing you built a better brake system.
Conclusion
Hydraulic brake modifications can elevate your biking experience by delivering stronger, more reliable stopping power tailored to your needs. We’ve explored how upgrades like larger rotors, improved pads, and 4-piston calipers can greatly boost braking performance, especially on fast or heavy e-bikes. Remember that any modification should be approached with both performance and safety in mind. The best results come from using quality components, following proper installation procedures, and taking the time to fine-tune and test your brakes.
When done properly, these upgrades instill greater confidence – you can ride harder or carry heavier loads knowing your brakes can handle it. Even simple changes like better pads or an added motor cut-off sensor contribute to a safer ride. As a DIY enthusiast, you have the power to transform your bike’s braking feel in your own garage. Leverage your experience, stay detail-oriented, and don’t be afraid to seek expert advice for the more complex steps. In the end, you’ll not only have improved your bike’s hardware, but also your own knowledge and trust in your machine. Happy riding, and enjoy the sharper, smoother stopping power from your upgraded brakes!