If you’ve ever pulled your e-bike brake lever and felt that annoying soft, spongy give, you’re not alone. Hydraulic brakes are amazing for smooth stopping power, but the moment air sneaks in or seals wear out, that lever can feel mushy. It’s frustrating when a high-tech brake acts more like an old balloon. In this guide we’ll cover the usual culprits – air bubbles, loose fittings, low fluid – and walk through step-by-step fixes. By the end, you’ll know how to restore that firm, confident lever feel.
Featured Summary – Common Hydraulic Brake Issues on E-Bikes
- Brake lever feels soft or mushy: Air is in the line or fluid is low.
- Lever stiff with spacer but soft with pads: Pistons not fully seated.
- No braking power after a fall or repair: Air got trapped or hose shifted.
- Persistent air bubbles despite bleeds: Bleeding error or bad fittings.
- Leaking or old fittings: Fluid escaping, pressure drops.
Let’s break down what’s happening inside your hydraulic system – and how to fix it for good.

Why Your Hydraulic Brake Lever Feels Soft or Spongy
Air Trapped in the System

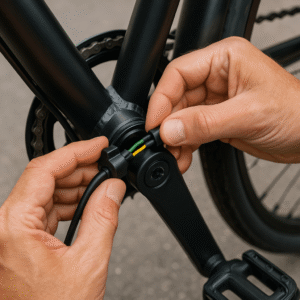
E-bike hydraulic brake lever with a soft, spongy feel.
Even tiny air bubbles can ruin brake feel. Air compresses much more than fluid, so when you squeeze the lever those bubbles squash instead of pushing the pads. The result is a squishy, mushy lever. This usually happens if a bleed wasn’t done correctly or fluid was low. Common mistakes include skipping the final top-up or using the wrong fluid. The cure is a proper full bleed: invert the lever so bubbles rise, push fluid slowly from the caliper up, and tap the caliper to shake out any air. Once all bubbles are gone and the fluid is topped up, the lever should feel solid again.
Using the Spacer vs. Actual Pads
It’s normal for the lever to feel rock-hard when you bleed with the caliper spacer in place, then soften up once the actual pads are installed. The spacer pushes the pistons almost fully out, so fluid only has to move a short distance. With real pads, the pistons retract slightly and the pad springs absorb a bit of pressure, so the lever travels a little more. To fix this, squeeze the lever several times after installing the pads. This pushes the pistons back out against the rotor and reseats them. After doing this, your lever should have a firm initial bite and feel as crisp as before.
Low Fluid Level or Wrong Fluid Type
Brake systems must be topped up with the correct fluid (usually mineral oil on e-bikes like Shimano or Magura, or DOT fluid on others). If the reservoir runs low, air can be drawn in and pressure drops. Always check the fluid level and refill to the proper mark. Also, never mix DOT and mineral oil: they are not compatible. Using the wrong fluid or letting it get contaminated will prevent a good bleed and make the lever feel spongy. Stick to the manufacturer’s fluid and replace it periodically to keep your brakes happy and firm.
Recommended: Aventon vs. Lectric eBikes: Comprehensive Comparison Guide
When Bleeding Doesn’t Work – Hidden Causes
Incomplete Bleeding Sequence
Sometimes the lever still feels soft even after multiple bleeds. Often this is due to an incomplete bleed sequence. Always bleed from bottom to top: start at the caliper, push fluid up to the lever, and finish with the lever’s bleed port. If you open bleed ports in the wrong order or skip the final lever bleed, you can trap air. A common mistake is bleeding only at the caliper and not giving the lever its own bleed. To do it right, loosen the caliper nipple, pump fluid upwards, then open the lever’s bleed port and let fluid out. Tighten everything and squeeze the lever; following the full bottom-to-top bleed ensures no air remains.
Reused or Damaged Fittings

Another hidden cause is damaged or reused hose fittings. Every time you disconnect a hydraulic hose, you deform the small brass olive and steel barb that seal the connection. If you reuse old fittings, they may not seal perfectly, letting tiny air leaks occur. The fix is simple: always install a new olive and barb whenever you reconnect a hose. Fresh fittings ensure a proper seal. Skipping this step can lead to gradual leaks and a lever that gets spongy days later. Think of it as putting a new gasket on an engine – it just makes things work correctly.
Bleed Kit and Tool Quality
Believe it or not, your tools can introduce problems. Cheap syringes, loose hoses, or worn seals in the bleed kit can allow air in during bleeding. If fluid leaks out of the syringe or air bubbles get sucked in, you’ll never get a firm lever. Use a high-quality brake bleed kit with oil-resistant seals and snug-fitting tubing. Clear tubing helps you see bubbles. Invest in good syringes and caps, and replace any cracked parts. A reliable kit is worth it – it saves you from repeating bleeds over and over without success.
Recommended: Best Recommended Durable Hydraulic Brake Conversion Kits for Electric Bikes
Replacing or Repairing the Brake Lever
Do You Need New Fittings Each Time?
When you remove the brake lever or hose, always use new fittings on reassembly. In plain terms: yes, you should replace the olive and barb if you’ve unscrewed the hose from the lever. The old ones deform and invite leaks. By installing a fresh olive/barb kit, you restore a perfect seal and keep air out. It costs a few dollars but saves you headaches. Skip this step and you might find the lever softening up again as air sneaks in. So replace those fittings – it’s that important.
Installing and Re-Bleeding Correctly
When you swap out a lever or hose, follow these steps for a rock-solid brake:
- Mount the new lever: Secure the replacement lever on your handlebar.
- Attach hose with new fittings: Slide a new olive and barb onto the hose, then screw it into the lever and tighten to spec.
- Bleed the system slowly: With the bike positioned so air rises toward the lever, pump brake fluid through from the caliper upward. Open the caliper bleed nipple and let fluid flow until no bubbles appear.
- Test lever firmness (no pads): Before installing pads, squeeze the lever. It should come to a hard stop partway down. If it still feels soft, repeat the bleed.
- Install pads and rotor: Put the brake pads and wheel back on. Then squeeze the lever a couple of times to center the pistons in the caliper.
- Final test: Pump the lever again. It should stop firmly about halfway to the handlebar. If it does, you’re ready to ride.
By following this order, you build pressure from the lever downward, squeezing out any last bubbles. It’s the difference between a mushy brake and one that feels crisp and new.
After a Fall – Restoring Brake Pressure
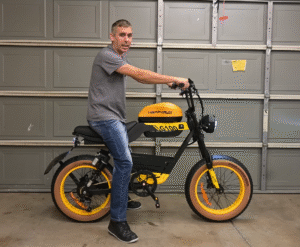
Cyclist testing firm brake feel after hydraulic repair.
Even a minor crash can mess with your brakes. A fall can jar air bubbles loose, put a kink in a hose, or loosen a fitting. Start by inspecting the brake: check that the lever is straight and the master cylinder has no cracks. Look along the hose for kinks or sharp bends. Feel around the caliper and lever ends for wet fluid – any leak means you’ll need to fix it and bleed again. If you find no leaks, try a quick trail-side trick: hang the bike so the lever is down and the caliper is up, open the bleed nipple, and let fluid drip out (this forces air up and out). This gravity bleed won’t replace a proper garage bleed, but it can give you back enough braking to ride home safely.
Quick Checks After a Crash:
- Bent or cracked parts: A bent lever or cracked reservoir can kill braking force.
- Hose damage: Check for kinks or cuts. Even slight twists can jam the pistons.
- Oil leaks: Any fluid around the caliper, lever, or hose fitting means a leak.
- Brake alignment: Verify the rotor and pads are still aligned. An out-of-true wheel can catch the brakes.
If the lever is almost dead on the trail, play it safe: ride cautiously or stop. It’s better to limp home and do a proper bleed in the garage than push a weak brake on a dangerous descent.
Recommended: Troubleshooting Bafang G063 Hub Motor Cable Rubbing Issues
Quick Checklist for Troubleshooting Hydraulic Brakes
| Symptom | Possible Cause | Quick Fix |
|---|---|---|
| Lever feels spongy | Air in line | Re-bleed system |
| Lever stiff with spacer but soft with pads | Pistons not reseated | Pump lever with pads installed |
| No pressure after crash | Dislodged hose / air entry | Check fittings & re-bleed |
| Fluid leak | Damaged olive/barb | Replace fittings |
| Lever pulls to bar | Low fluid / trapped air | Top up fluid & full bleed |
In most cases, a thorough bleed and fresh fittings will fix the problem. Use this table to pin down symptoms and get the right fix quickly.
Preventive Maintenance for Long-Lasting Brakes
A little routine care goes a long way:
- Inspect hoses regularly: Look for cracks or fluid weeping. Early detection prevents leaks.
- Keep reservoirs clean: Wipe off dirt before opening the brake cap, so contaminants don’t enter.
- Bleed brakes every 6-12 months: Even without issues, moisture and dirt accumulate in fluid.
- Store the bike upright: If parked sideways or upside-down, air can migrate into the master cylinder.
- Use the correct fluid: Stick with the manufacturer’s recommended mineral oil or DOT fluid.
Treat your hydraulic brakes like precision equipment and they’ll reward you with years of reliable performance.
Expert Tips to Get a Rock-Solid Lever Feel
- Tap out hidden bubbles: During the final bleed, gently tap the caliper and lever with a screwdriver handle or your palm. Vibrations shake out tiny trapped air bubbles.
- Bleed slowly: Push fluid in steady, slow strokes so bubbles can rise calmly. Rushing the process can trap air.
- Tighten screws to spec: Avoid overtightening bleed nipples or lever clamp bolts. Stripped threads or warped parts can leak.
- Check lever pull: After bleeding (pads out), the lever should stop about halfway to the bar when firm. If it easily bottoms out, there’s still air.
- Test before every ride: Give the lever a firm squeeze. It should feel immediately solid. If it feels soft, fix it before heading out.
These habits will keep your brakes feeling crisp and confident ride after ride.
Final Thoughts
“A spongy brake lever doesn’t mean your e-bike is broken – it just needs patience and the right bleeding technique,” as one rider puts it. With a careful bleed and fresh fittings, you can bring back that crisp, solid feeling in no time.
In the end, a firm brake lever is all about the details: evacuating every air bubble, sealing every fitting, and testing thoroughly. Once you master the art of a proper bleed and clean installation, your brakes will feel better than new.