If your electric bike suddenly loses power or won’t start, a faulty controller could be the culprit. The controller is the brain of your e-bike, coordinating the motor, battery, throttle, and sensors. Troubleshooting a controller problem involves a systematic check of your bike’s electrical system – from simple connection fixes to testing components with a multimeter. As an electric bicycle expert, I’ll guide you through a step-by-step process to identify what’s wrong with your motor controller and how to fix it. This comprehensive guide will help you resolve any electric bike controller issues and get back to riding confidently.

Quick Summary
- Check the basics: Ensure the battery is charged and the main power switch is turned on. Many issues are solved by simply restarting the e-bike (power it off and on again).
- Inspect all connections: Examine the wiring connectors between the battery, controller, motor, throttle, and brake sensors for any loose or disconnected wires. Reseating a loose connection or tightening a plug can instantly fix many problems.
- Verify fuses or breakers: If your controller has a fuse or circuit breaker, check it. A blown fuse or tripped breaker will cut power – replace a blown fuse or reset the breaker as needed.
- Test the brake and throttle inputs: Make sure your brake levers aren’t stuck engaging the motor cut-off switch (an engaged brake sensor will prevent the motor from running). Similarly, check that the throttle isn’t damaged or stuck in one position.
- Look for error codes: Many e-bikes display error codes or flashing LEDs when there’s an issue. Check your display for any error message or fault indicator – these codes can pinpoint specific problems (consult your manual for code meanings).
- Use a multimeter for deeper tests: If basic checks fail, use a multimeter to systematically test the controller and related components. Confirm the battery voltage is reaching the controller and test continuity of wires. You can also measure throttle signal output and check motor phase wires or sensor signals.
- Replace if necessary: When a controller is confirmed faulty, replace it with the correct type that matches your e-bike’s motor and battery specifications. Using an incompatible controller can cause further damage, so ensure the new unit is compatible.
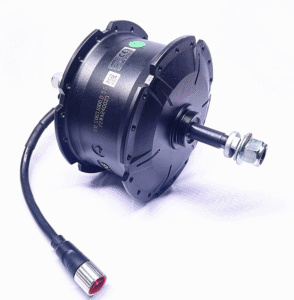
Understanding the E-Bike Controller’s Role
Your e-bike’s controller is essentially the bike’s central computer. It connects the motor, battery, throttle, pedal assist sensors, brakes, and display, coordinating them like a small on-board computer. Think of it as the “brain” of your electric bicycle – if the controller isn’t working, the rest of the system won’t behave properly. The controller regulates power delivery to the motor, monitors sensor inputs (like brake cut-offs and pedal cadence), and often communicates error codes or status information to your display.
Because the controller links so many components, symptoms of a controller problem can sometimes actually be caused by another part. For example, a loose wire or bad sensor can make the controller seem faulty. Various issues can impact the controller, from faulty wiring or connections coming loose to a stuck power switch or a blown fuse. The good news is that many controller-related glitches turn out to be minor and easily fixed. It’s important to stay calm – often a small wiring issue or reset is all that’s needed to get an e-bike controller working again.
Common Signs of a Faulty Controller
How do you know the controller might be at fault? Here are some common symptoms riders experience when a controller is malfunctioning:
- No power to the motor: The bike’s display might turn on, but the motor doesn’t respond at all. The e-bike won’t move even with throttle or pedal assist input. (If both your throttle and PAS fail to activate the motor on a bike that has both, the controller or its power supply is a likely cause.)
- Intermittent cutting out: The motor works, but occasionally loses power or cuts out while riding. For instance, the e-bike may suddenly stop providing assist on bumpy roads or hills, then work again after a restart. Studies have shown that up to 35% of e-bike controller issues stem from power inconsistencies causing this kind of sudden power loss.
- Erratic behavior: The motor’s power delivery is unpredictable – it may surge unexpectedly or the speed may fluctuate without input. You might experience uneven pedal assist or throttle response. This could indicate the controller is misinterpreting sensor signals or failing to regulate current properly (often due to wiring interference or sensor faults).
- Error codes on display: Many modern e-bikes will flash an error code number or blink an LED when the controller detects a fault. For example, an error code might indicate a throttle issue, motor sensor error, or low voltage. Paying attention to these codes can save time – they are designed to point you to the problem. A flickering or blank display can also be a sign of controller or communication problems.
- Overheating or burnt smell: If the controller becomes extremely hot to the touch or you notice a burnt electronics smell, that’s a red flag. Overheating can trigger the controller’s thermal shutdown – about 15-18% of controller faults are due to thermal overload causing the controller to cut off power. In severe cases, you might even see scorched wiring or melted casing on the controller.
- No response to throttle or pedal assist: If twisting the throttle does nothing and pedal assist also doesn’t engage the motor (and you’ve verified the battery is on), the controller isn’t delivering power to the motor. On e-bikes with both throttle and PAS, issues that affect both inputs often trace back to the controller or a power delivery problem, rather than a single sensor. If one method works but not the other (for example, PAS works but throttle doesn’t, or vice versa), the issue could be isolated to that specific component or its wiring instead of the controller.
These symptoms can overlap with other issues (for instance, a bad motor or battery can also cause no power). That’s why the next step is to methodically troubleshoot and isolate the cause, starting from easy fixes toward more involved tests.
Safety Precautions Before Troubleshooting
Working on an e-bike controller involves electricity, so safety is paramount. Before you begin any troubleshooting steps, take the following precautions:
- Power down and disconnect: Always turn off the e-bike and remove the battery or disconnect power before touching any wiring. This eliminates the risk of shorting the system or getting shocked while you work.
- Use protective gear: It’s wise to wear safety glasses and insulated gloves when examining electrical components. Metal tools can short a battery if you’re not careful, so using insulated or non-conductive tools is recommended.
- Dry, safe workspace: Work in a dry, well-lit area away from water or rain. Moisture and electricity don’t mix – a clean, dry workspace will help prevent accidents. Also, keep your work area organized; dropping a metal tool on a live circuit can cause sparks.
- Know your limits: If a procedure feels beyond your comfort level, consider seeking help from a professional e-bike technician. It’s better to ask for help than risk injury or damaging your bike. Remember that controllers can carry significant current, and improper handling can lead to further damage.
By following basic electrical safety – power off, protect yourself, and go slow – you can troubleshoot confidently and avoid any mishaps. Now, let’s move on to diagnosing the controller step by step.
Basic Troubleshooting Steps for E-Bike Controllers
Most e-bike controller problems can be resolved with systematic checks. We’ll start from the simplest potential fixes and work toward more advanced diagnostics. Go through these steps in order, and you’re likely to find the issue:
Step 1: Verify Battery Power and Restart
Ensure your e-bike actually has power to the controller. Double-check that the battery is charged and properly seated or connected. Many e-bikes have an on/off switch or key – make sure it’s in the “On” position. It sounds obvious, but we’ve all forgotten to turn on the battery pack or accidentally bumped the kill switch at some point.
If the bike was on and suddenly went unresponsive, try a power reset: turn the bike completely off, wait 10-15 seconds, and turn it on again. Just like rebooting a computer or phone can clear a glitch, cycling the power on your e-bike can reset the controller’s logic. This simple reboot often fixes minor electronic hiccups.
While you’re at it, observe any battery indicator lights or the display when powering on. If nothing lights up at all, the issue might be with the battery or main power connection rather than the controller. But if the display powers on normally and you still have no motor function, it points toward a controller or wiring issue downstream.
Step 2: Inspect All Connections and Wiring

The next step is a thorough check of all the electrical connections. A vast number of e-bike issues boil down to a loose or unplugged wire, so take your time here. With the battery disconnected, examine the cables running from the battery to the controller, and from the controller to the motor, throttle, display, and brake cut-off sensors.
Look for any connectors that may have come partially undone. Even a slightly loose plug can break the circuit and stop the motor from working. Unplug and reconnect each connector one by one, making sure it clicks in securely. Most e-bike wiring is color-coded (for example, a blue connector plugs into a blue socket), which makes it easier to match them up correctly. If you find corroded pins or dirt in a connector, clean it gently and reconnect. A bit of dielectric grease can be applied to connector pins to improve conductivity and prevent corrosion, if you have it.
Don’t forget to check the wiring harness for any obvious damage. Inspect the cables for cuts, frayed insulation, or pinched sections. A damaged wire can interrupt the signal or power. If you recently did any maintenance or had a crash, a wire may have been accidentally tugged or broken. Gently tug on each wire to ensure it’s firmly attached and not brittle or about to snap off.
Many controller problems are resolved at this stage by simply plugging in an unplugged cable or fixing a weak connection. Once you’ve secured all wires, reconnect the battery and test the bike again. If you now have power and motor function, you likely found the culprit – a loose connection.
Step 3: Check Fuses and Circuit Breakers
Most e-bike systems have some form of electrical protection, either a fuse or a circuit breaker (or sometimes both). These are designed to blow or trip if there’s an electrical overload, in order to protect your controller and other components. If your bike suddenly lost all power, a blown fuse or tripped breaker could be why.
Locate the fuse: Many e-bike batteries or controllers have a main fuse in line with the power cable. It may be inside the battery case or in a fuse holder on the wiring. Consult your bike’s manual for the fuse location. Remove the fuse and inspect it. If the metal filament inside the fuse is broken or the glass is blackened, the fuse has blown. Replace it with a new fuse of the exact same rating (same amperage) before powering the bike back on. Never bypass the fuse or use a higher-rated fuse, as that can risk damage or fire.
Check for a circuit breaker: Some e-bikes use resettable circuit breakers (small buttons or switches) instead of fuses. If your controller has a circuit breaker, it may have popped out to indicate an overload. Press the breaker to reset it. If it immediately trips again when you power on, there may be a short circuit or a serious problem (in that case, leave it off and continue troubleshooting other areas).
It’s worth asking: Why would a fuse blow or breaker trip? Possible causes include a short in the wiring, a faulty component drawing too much current, or even connecting a controller to the wrong voltage battery. For instance, installing a 72V controller on a 60V battery can confuse the system’s voltage protections and cause shutdowns. If you find a blown fuse, replace it and then monitor closely in case it blows again – that would indicate an underlying issue causing an overload.
Step 4: Examine Brake Sensors and Throttle
E-bike controllers often have safety interlocks that can disable the motor. Two common ones are the brake cut-off sensors and the throttle. If these are malfunctioning, they can prevent the controller from activating the motor even if everything else is okay.
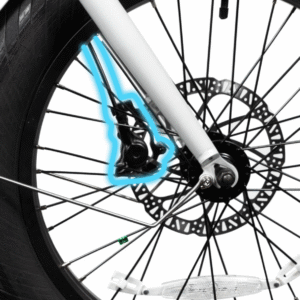
Brake cut-off switches: Nearly all e-bikes have brake levers with built-in electrical switches. When you squeeze the brakes, the switch signals the controller to cut power to the motor (so you don’t fight against the motor while braking). If a brake lever sensor is stuck or misaligned, the controller may “think” you’re braking all the time and thus won’t power the motor. Check that your brake levers fully release and that any magnetic sensors near the levers are properly positioned. Sometimes a magnet can fall out or a sensor can get knocked loose, causing a constant cut-off signal. Unplugging the brake sensors from the controller (they usually connect via thin wires to the controller) is a useful test – with the sensors unplugged, try using the throttle/PAS. If the motor starts working, you’ve found the issue in a bad brake switch. (Just be cautious riding without brake cut-offs, as the motor won’t automatically stop when braking until you fix the sensor.)
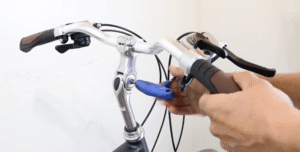
Throttle: If your e-bike has a throttle, a lot rides on this component working correctly. A sticky or broken throttle can keep the controller from providing power. First, observe if the throttle snaps back to its neutral position when released. A throttle that sticks in the “on” position or feels loose might be defective. You can try manually wiggling or repositioning it to see if the connection is restored. Also, check the throttle’s connector wire to the controller (usually a three-wire plug). Make sure it’s secure.
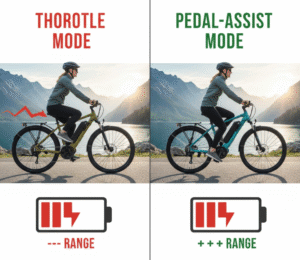
If you have both throttle and pedal assist (PAS), try testing the bike in PAS mode versus throttle to see if one method works. For example, if pedal assist functions but the throttle does nothing, the throttle or its wiring is likely at fault, not the controller. Conversely, if neither works, the controller or a common power issue is more suspect.
A handy trick for throttle testing (if you’re technically inclined) is using a multimeter: the throttle usually receives +5V from the controller and sends back a variable signal (about 1.0 V at rest up to ~4.0 V at full twist). By probing the throttle signal wire, you can see if it’s changing voltage when you twist – if it is, the throttle is working and sending commands, and the controller should be responding. If the voltage stays fixed (or there’s no 5V supply), either the throttle is bad or the controller isn’t powering it. This gets a bit advanced, so if you’re not comfortable with probing wires, you might skip this and proceed to the next steps.
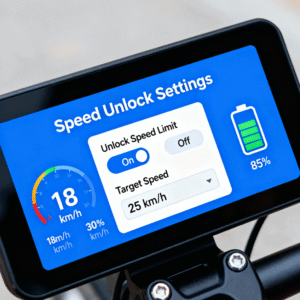
Step 5: Check the Display for Error Codes
Modern electric bikes often have built-in diagnostics. If your bike’s display is showing an error code (like “E-07” or blinking lights), take note of it. These codes are there to help and can significantly narrow down the problem. For instance, an error code might indicate a motor hall sensor fault, an over-voltage warning, or a controller communication error.
Consult your e-bike’s user manual or the manufacturer’s website for a list of error codes specific to your model. Some displays will cycle between normal readings and an error number, while others might just flash a light in a pattern. For example, two quick blinks might mean “throttle error” whereas three blinks might mean “motor overheat” – it varies by brand.
If you’re unsure, you can also search online using your bike model and the error code as keywords. Many e-bike communities have lists of common error codes. Addressing the specific issue (e.g., reconnecting a loose sensor or letting the controller cool down) can clear the code. In some cases, you may need to use the display’s settings to reset the error or cycle the power after fixing the issue.
Even if there’s no obvious error code, pay attention to any unusual behavior on the display. Is the speed reading erratic? Does the battery level drop suddenly? These can be indirect clues. Flickering or dim displays can indicate a voltage issue or poor connection to the controller. The key is to gather as much information as possible. The controller is designed to relay problems to you via the display when it can, so don’t ignore those signals if they’re present.
Step 6: Test the Controller and Components with a Multimeter

If you’ve gone through steps 1-5 and still haven’t pinpointed the problem, it’s time to perform some electrical tests on the controller’s circuit. This is a more advanced step, but it’s essential for isolating stubborn issues. Here are a few key tests:
- Battery voltage to controller: With the battery on, use a multimeter to measure the voltage at the controller’s input wires (where the controller connects to the battery). You should see the full battery voltage (e.g., ~36V on a 36V system). If there’s no voltage, the issue lies upstream – possibly a blown fuse, bad battery connection, or faulty power switch. If you do have voltage present at the controller input, the controller is at least being powered properly.
- Continuity and wiring checks: Turn off the battery again. Use the multimeter’s continuity setting to check if key wires are intact. For example, test the motor phase wires (the thick wires from controller to motor) for continuity – no continuity could mean a break in the wire. Also check the smaller Hall sensor wires if your motor has them; a broken Hall sensor wire can cause the motor to stutter or not run at all. Inspect the connectors while doing this – sometimes a pin can push out of a connector housing and lose contact.
- Throttle and brake sensor signals: As mentioned earlier, you can measure the throttle signal wire voltage as you operate the throttle (with the bike powered on). It should vary smoothly from roughly 1 V to 4 V. If it does and the motor doesn’t respond, the controller might not be interpreting the throttle input. Similarly, check the brake cut-off wires: they usually carry 5 V when brakes are not applied, which drops to 0 V when you pull the brake (or vice versa for some systems). If a brake sensor line is stuck at 0 V, the controller thinks you’re braking. Identifying a weird reading here can confirm a bad sensor rather than the controller itself.
- Output tests: This is tricky without special equipment, but you can try to see if the controller is sending anything to the motor. One crude test: with the bike powered and wheel off ground, give throttle and carefully listen/feel if the motor cogged or jerked at all. If nothing whatsoever, the controller might not be sending power. With a multimeter, you can’t easily read the rapid AC pulses on the motor phase wires (that would require an oscilloscope), but a no-load test could involve measuring DC voltage on phase wires – you might see a twitch in voltage when throttle is applied, but often a better approach is swapping in a known-good controller to see if the motor runs.
If all this sounds daunting, don’t worry – not everyone will want to perform these electrical tests. Do as much as you’re comfortable with. The goal of using a multimeter is to verify where the electrical pathway is breaking. For many DIY enthusiasts, these tests are the logical next step, and they can reveal issues like a shorted MOSFET in the controller or a bad motor Hall sensor. For example, if the motor stutters or vibrates but won’t spin, that often points to a Hall sensor or phase wiring problem rather than the controller itself. On the other hand, if absolutely no power is making it to the motor phases, that suggests the controller’s output stage might be blown.
By the end of this step, if you still haven’t found the exact cause, it’s quite likely the controller itself has an internal fault. At this point you can consider advanced repairs or move on to replacing the controller.
Advanced Diagnostics and Controller Repair
For the technically inclined, advanced troubleshooting goes inside the controller box. This means opening up the controller’s case to inspect and possibly repair its electronics. Only attempt this if you have some electronics experience, as it involves delicate components:
- Internal inspection: Disconnect all power and open the controller’s enclosure (usually a small aluminum box). Look at the circuit board for obvious signs of damage: burned components, blackened areas, melted solder, or bulging capacitors. A common failure is burnt MOSFETs (the transistors that drive the motor) – they may show scorch marks or cracked casing. Also check for loose or cracked solder joints, which can happen from vibrations. If something looks clearly fried, that’s a strong indication the controller needs repair or replacement.
- Testing components: With a multimeter, you can perform some component tests. For instance, test the MOSFETs using the diode test mode on the multimeter to see if any are shorted out. You can also check resistors near the burnt area to see if they blew. If you find a single failed part (like one MOSFET or a capacitor), you might attempt to replace it if you’re handy with a soldering iron. However, replacing components on a controller PCB can be challenging due to tight spacing.
- Firmware or resets: Some advanced controllers allow firmware updates or resets via a programming interface or software. If your manufacturer provides a firmware update tool, it might be worth trying to re-flash the controller’s firmware. This can occasionally clear weird bugs or communication issues. Be sure to follow official instructions, as a failed firmware update can render the controller unusable.
- Oscilloscope tests: In professional settings, a technician might use an oscilloscope to watch the gate signals to the MOSFETs or the sensor signals in real-time. This can confirm if the controller’s brain (microcontroller) is sending out commands. While this level of testing is likely beyond a typical DIY repair, it’s good to know that if you take your e-bike to a specialist, these are the kinds of diagnostics they might perform.
Proceed with caution when working on the controller’s internals. Electrostatic discharge (static electricity from your body) can damage sensitive chips, so ground yourself or wear an anti-static strap if possible. Also, remember that even a disconnected controller can have capacitors that hold charge – always double-check with a multimeter that no voltage remains across the main capacitors before poking around.
If you identify a specific bad component and have the skills, replacing it can revive a dead controller. For example, some enthusiasts have successfully replaced burned MOSFETs or voltage regulators on their controllers and brought them back to life. However, if the damage is extensive or you’re unsure, you might save time and ensure reliability by opting to replace the controller entirely.
Repair or Replace? Making the Decision
After troubleshooting, you should have a clearer idea of whether the issue lies in the controller itself or an external factor. If you’ve confirmed the controller is faulty (for instance, you found burned components or the controller still doesn’t work despite ruling out all other possibilities), you have two main options: repair the controller or replace it.
Repairing the controller: Repair at component level can be cost-effective if the damage is minor (like a single blown capacitor or wire) and you have the electronics know-how. Sometimes a skilled electronics repair shop can fix a controller by replacing the faulty parts. However, this isn’t always guaranteed. Modern controllers pack a lot of electronics in a small space, and diagnosing the exact failure can be tricky. You also need to source the correct replacement parts and solder them correctly. If you enjoy tinkering and the controller is out of warranty anyway, it might be a fun project to attempt. Just be aware that a botched repair could make things worse. When in doubt, there’s no shame in taking it to a professional – a certified e-bike technician can determine if the controller can be salvaged or if it’s beyond repair.
Replacing the controller: In many cases, the straightforward solution is to buy a new controller and swap it in. Controllers aren’t usually very expensive, and a new one can often solve the problem in one go. When replacing, it is absolutely crucial to get a controller that is compatible with your e-bike’s system. Match the specifications: the controller should support your battery’s voltage (e.g., 36V, 48V, etc.) and be rated for at least the same current or wattage as the original. Also, ensure it’s designed for your type of motor (brushless hub motor controllers vs. mid-drive controllers can differ, as can controllers for sensored vs. sensorless motors). Not all controllers are universal, so using the wrong type could result in it not working or even damaging other componentsrydybikes.com. Always check with the e-bike manufacturer or documentation when in doubt about compatibility.
The wiring harness is another consideration. A replacement controller may come with a different connector arrangement. You might need to do some minor rewiring or use adapters to hook up all the components. Take photos of your original controller’s connections before removing it, to help you install the new one correctly. Many aftermarket controllers come with wiring diagrams. If possible, get one made as a drop-in replacement for your bike model – this will make installation much easier.
Once the new controller is installed and connected, test the bike thoroughly. Verify that the motor engages properly with both throttle and pedal assist, check that brake cut-offs work, and that your display shows no error codes. It should feel as good as new, or even better if the new controller has improved performance.
Lastly, if your bike is still under warranty, replacing the controller on your own could void that warranty. It’s wise to contact the manufacturer in such cases; they might send a replacement controller or direct you to an authorized repair center.
In summary, if you’re technically inclined and the fix is minor, repairing the controller can be rewarding. But for most riders, swapping in a new, compatible controller is the quickest path to get back on the road with confidence that the issue is resolved.
Preventive Maintenance for Your E-Bike Controller
Now that you’ve dealt with the controller issue, let’s talk about preventing future problems. A controller can last many years if treated well. Here are some best practices to keep your e-bike’s controller and electrical system healthy:
- Keep it dry: Water is a common enemy of electronics. Avoid leaving your e-bike out in heavy rain, and never submerge the controller. The controller casing is usually water-resistant but not fully waterproof. If you must ride in wet conditions, consider using a waterproof cover or bag for the controller, or at least dry it off afterward. In the event the controller does get drenched, let it dry completely (open the case and use a fan or gentle heat if necessary) before using the bike again.
- Avoid overheating: E-bike controllers can get warm under normal use, but excessive heat will shorten their lifespan. You can prevent overheating by not overloading your bike beyond its design. This means avoiding extremely steep hills or heavy cargo that strain the motor and controller beyond their capacity. Know your e-bike’s power limits – for example, if it’s a 250W commuter bike, don’t expect it to tackle long steep climbs without getting hot. If you plan to push the bike hard, give it a rest in between or upgrade to a higher-rated system. Also ensure the controller’s location on the bike has some airflow. If it’s stuffed in a bag or tight enclosure with no cooling, consider adding ventilation. Overheating can trigger thermal cut-offs or even cause component failure over time.
- Regular check-ups: Make a habit of inspecting your e-bike’s wiring every so often. Vibrations from riding can loosen connectors over time. Every few months, or after long rides on rough terrain, do a quick once-over of the controller connectors, battery terminals, and sensor wires. Ensure everything is snug. Look for any signs of rubbing wires or accumulating dirt. Catching a chafing cable or corrosion early can prevent an unexpected failure later. Cleaning contacts that show oxidation (with electronic contact cleaner or a bit of vinegar for battery terminals, as some recommend) can maintain good conductivity.
- Firmware updates: If your e-bike or controller manufacturer releases software/firmware updates, take advantage of them. New firmware can fix bugs that cause random controller resets or improve the accuracy of error detection. Not all controllers are updateable by the end-user, but some newer models have smartphone apps or USB connections for this purpose. Always follow official instructions when updating to avoid any mishaps.
- Proper storage: When not in use for long periods, store your e-bike in a dry, moderate-temperature environment. Extreme cold or heat can degrade electronic components and batteries. If you’re storing over winter, consider removing the battery and keeping it indoors (and charge it to around 50-70% for storage). A quality bike cover can protect the bike from dust and moisture if you have to store it in a garage or outside.
- Quality components: Finally, if you ever need to replace parts (like a throttle, brake sensor, or even the controller itself), use quality replacements from reputable brands or the original manufacturer. Cheaper generic parts might not have the same reliability or weatherproofing, which could lead to controller issues down the line.
A little preventative care goes a long way. By treating your e-bike’s electronics with care – keeping them dry, not overstressing them, and checking connections periodically – you’ll minimize the chances of encountering controller problems in the future. Electric bikes are robust machines, but like any bicycle, a bit of routine maintenance will ensure they remain safe and enjoyable to ride.
Conclusion: Troubleshooting an e-bike controller might seem intimidating at first, but as we’ve shown, it’s often about checking the simple things: power, connections, and sensors. Most controller issues turn out to have straightforward solutions. By following this guide, you approached the problem methodically from basic to advanced steps, which is the key to effective troubleshooting. Hopefully, your e-bike is up and running again with a happy controller. With regular maintenance and the knowledge you’ve gained, you can ride with confidence knowing that even if a problem arises, you have the tools and understanding to handle it. Happy riding!