Featured Summary
This comprehensive guide walks you through every step of bearing troubleshooting on your electric bike. From spotting early warning signs to performing professional-grade inspections, cleaning, lubrication, and replacement, you’ll learn how to keep your ride smooth and efficient.
Discover how to confidently tackle bearing issues on your electric bike in under 100 words. Learn to identify symptoms, use the right tools, perform thorough inspections, and apply expert maintenance techniques for lasting performance.
Why Bearings Matter on an Electric Bike
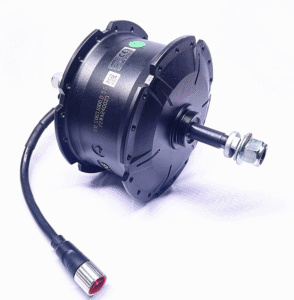
The Role of Bearings
Bearings are the unsung heroes that let wheels, pedals, and motors spin without unnecessary friction. By minimizing resistance, they boost your bike’s efficiency and extend the lifespan of drivetrain and electrical components.
Consequences of Neglected Bearings
Ignoring worn bearings leads to harsh grinding noises, reduced battery range, and uneven wear on motor gears. Left unchecked, minor issues can escalate into costly repairs or complete hub failures.
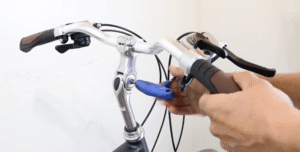
Signs of Bad Bearings

Auditory Clues
- Grinding noises indicate metal-on-metal contact inside the bearing.
- Clicking or popping often means a broken cage or loose ball bearing.
Physical Symptoms
- Lateral play: Wiggle the wheel side-to-side to detect loosening.
- Stiff rotation: Spin the wheel; resistance or uneven movement signals damage.
Performance Indicators
- Noticeable drop in pedaling smoothness.
- Increased power draw from the motor, reducing range and battery health.
Tools Needed for Bearing Troubleshooting
Basic Toolkit
- Open-end wrenches (15 mm, 17 mm) for wheel nuts and crank bolts.
- Hex keys (3 mm-8 mm) for calipers and motor covers.
- Clean rags and gloves to prevent contamination.
Precision Instruments
- Dial indicator to measure micrometer-level play.
- Torque wrench ensuring correct tightening without overpressure.
- Calipers to verify bearing inner and outer diameter.
Professional-Grade Equipment
- Hydraulic press or bearing press kit for seamless bearing seating.
- Ultrasonic cleaner to remove deep-seated grime.
- Bearing puller or slide hammer to extract stubborn bearings without damage.
How to Inspect Bearings

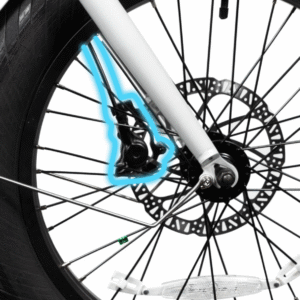
Wheel Hub Bearings
Visual Inspection
Start by removing the wheel. Check the bearing seals for cracks or corrosion. Look for pitting or discoloration around the races.
Manual Testing
Mount the wheel on an axle stand. Rotate it slowly while listening for abnormal sounds. Then, place hands on opposite sides of the hub and rock the wheel gently to detect play.
Mid-Drive Motor Bearings
Accessing the Motor
Unbolt the motor casing with a hex key. Label wiring connectors to ensure correct reassembly.
Feel and Sound
With the motor disengaged, turn the motor shaft by hand. Notice any gritty texture or scraping sounds. These indicate worn bearings inside the motor housing.
Bottom Bracket and Pedal Bearings
Crank Removal
Use a 14 mm socket or crank extractor to remove arms. Keep track of spacers and washers.
Bearing Spin Test
Rotate the bottom bracket spindle manually. Binding or stuttering rotation points to damaged bearings or inadequate lubrication.
Cleaning and Lubricating Bearings

Preparing for Service
- Secure the bike on a work stand for stability.
- Place drip trays under components to catch solvents and grease.
- Label parts and fasteners for organized reassembly.
Disassembly and Cleaning
- Remove bearings using a puller kit.
- Wipe old grease with a lint-free cloth.
- Soak bearings in isopropyl alcohol or a citrus-based degreaser for 10 minutes.
- Rinse and air-dry fully to avoid residual moisture.
Optimal Lubrication
- Choose a premium waterproof grease rated for high-speed applications.
- Apply a thin layer to bearing balls and races.
- Spin bearings at different angles to spread grease evenly.
- Wipe away excess to prevent dirt and grit accumulation.
Bearing Replacement Process

Selecting the Correct Bearings
| Bearing Series | Application | Bore Size (mm) | Load Rating |
|---|---|---|---|
| 6000 | Wheel hubs | 10 – 30 | Medium |
| 6200 | Motor shafts | 15 – 35 | High |
| 6800 (Thin-wall) | Lightweight hubs | 10 – 25 | Low-Medium |
| Cartridge | Bottom brackets | Integrated | Sealed, smooth |
Step-by-Step Replacement
- Align the new bearing on the press tool.
- Gently tap or press the bearing until it seats flush with the housing.
- Verify alignment: misaligned bearings will bind and wear prematurely.
- Clean mating surfaces before reassembly to avoid contamination.
Post-Installation Checks
- Spin each component to confirm smooth, silent rotation.
- Use a dial indicator to ensure minimal lateral play (<0.05 mm).
- Torque all fasteners to manufacturer specifications.
Preventative Maintenance
Routine Checkups
- Every 500 km: Listen for noises and check play.
- Every 1,000 km: Deep clean and relubricate bearings.
- Every 5,000 km: Replace bearings or servicing seals.
Riding and Storage Tips
- Rinse off mud and grit after wet-weather rides.
- Never soak bearings; use targeted sprays or wipes.
- Store indoors in a dry environment to prevent rust formation.
Advanced Bearing Care Tips
Upgrading to Ceramic Bearings
Ceramic bearings provide lower friction and longer lifespan. They resist corrosion and run cooler, boosting motor efficiency-but cost more upfront.
Enhanced Sealing Solutions
- Install extra silicone seals for submersion protection.
- Use double-shielded bearings in dusty or gritty environments.
Preload Adjustment Techniques
- Fine-tune bearing preload with shims to eliminate play without inducing binding.
- Recheck preload after the first 50 km post-maintenance to account for seating.
Troubleshooting Common Bearing Issues
Bearing Noise Persists After Lubrication
- Check for debris trapped under seals.
- Inspect adjacent components like rotor or sprockets for contact.
Excessive Heat in Motor Bearings
- Verify correct torque; over-tightening can crush bearings.
- Ensure proper grease quantity; too little leads to metal contact.
Rapid Wear in Harsh Conditions
- Switch to fully sealed, stainless-steel bearings.
- Apply protective coatings on bearing races before installation.