Steep hills aren’t about “more amps,” they’re about gear ratio × cadence. Run a smaller front ring + big cassette, keep cadence 70-100 rpm, set gentle current ramps, and manage heat. Do that, and your Bafang (BBS02/BBSHD/M600/M620) will climb smoother, cooler, and with far fewer drivetrain “death noises.”
Why Steep Hills Feel So Brutal (and What Actually Fixes It)
Hills punish two things: low motor rpm and over-torque at the chain. Mid-drives love spinning; bog them down and they get hot, loud, and cranky. The antidote isn’t “crank the current”-it’s mechanical advantage: a smaller chainring up front and a bigger cog out back so the motor spins faster for the same ground speed.
Key idea: If you can keep your pedal cadence at ~70-100 rpm on the climb, the motor is likewise in its efficient zone. Faster motor = less heat for the same power.
Quick wins
- Drop to a 34T-38T (even 30-34T for rough/steep MTB) chainring.
- Use at least an 11-42/46/50T cassette.
- If the bike can’t hold 70-100 rpm in your steepest section, you need lower gearing-period.
Recommended: Trek Electric Bike Review 2025: Pros, Cons, and Best Models
Pick the Right Gearing (This Is 80% of the Climb)
Let’s aim for gearing that lets you sit in that good-cadence window without having to mash.
Front Chainring Cheat Sheet
- BBS02/BBSHD (trail/city):30-38T
- Lots of climbing or loose surface? Start 30-34T.
- Mostly city with short pitches? 34-38T is fine.
- M600/M620 (M-series): 34-38T typical; go smaller if the bike and terrain are heavy/steep.
Cassette & Wheel Size
- Cassette: 11-42T minimum; 11-46/50T for real hills.
- Wheel size matters: 29″ > 27.5″ > 26″ in climbing difficulty. Bigger wheels need lower gearing to feel the same.
Chainline & Retention
- Small ring + big cog = extreme chain angle. Keep chainline tidy and consider a top chain guide if you ride chunky stuff.
Bottom line: If you can’t spin 70-100 rpm where the hill is steepest, drop ring teeth or add cassette range until you can.

Controller Setup: Make Power Usable (Not Spiky)
You want smooth torque that doesn’t nuke traction or cook the controller.
Five Parameters That Matter
- Battery Current (A):Start around 70-85% of your controller’s rated value. Example: 25 A controller → begin 18-22 A. You can bump later if temps are fine.
- Phase Current (A):This drives low-speed punch. Too high = wheelspin and chain abuse. Keep it moderate for steep/loose climbs.
- Start Current / Start Strength:Keep it low (say 10-20%) to prevent that “one-pedal rocket.”
- Assist Logic:Prefer current-based (power-graded) PAS over speed-based PAS. You want Level 1 to actually be gentle.
- Thermal Protections:If the firmware offers temp-based power roll-off, turn it on. If not, your wrist and brains are the protection.
Mini checklist
- ✅ PAS Level 1 feels like a nudge, not a shove.
- ✅ Throttle tip-in is smooth, with a short ramp.
- ✅ No sudden surges when cadence dips. If surging, reduce phase current or soften ramps.
Recommended: Best Electric Bikes with Pedal Assist: A Comprehensive Guide
How to Ride Steep Hills Without Cooking the System
Think “spin, don’t grind.”
- Cadence first: Keep 70-100 rpm on the steep stuff. If you drop under ~60 rpm, downshift immediately.
- Use PAS for long climbs: Gentle PAS is more efficient and cooler than long-held throttle at crawling speeds.
- Pulse obstacles: For ledges/roots, a short throttle blip is fine, but don’t drag throttle up the entire hill.
- Break the climb: On really long pitches, pedal 60-90 seconds, then ease up for 10-20 seconds to shed heat.
- Listen & feel: If the motor sounds “loaded” or the bike feels like it’s chugging, you’re under-geared-shift easier.
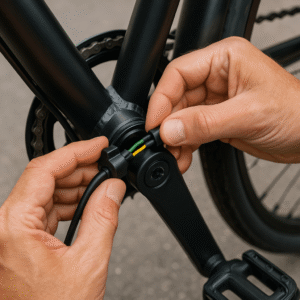
Battery & Wiring: Don’t Let the Power Path Be the Bottleneck
Climbs are sustained load. Weak links show up fast.
- Battery capability: Make sure your pack can deliver the continuous current your controller asks for. High internal resistance = voltage sag = heat everywhere.
- Cables & connectors: Keep them short, thick, and tight. Flimsy or oxidized connectors cause voltage drop and get hot.
- Anti-spark / Pre-charge: If you frequently connect/disconnect the pack, use XT90S or a pre-charge lead to protect the controller from inrush spikes.
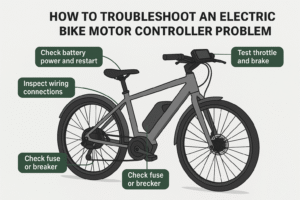
Recommended: How to Troubleshoot an Electric Bike Controller – Step-by-Step Guide
Heat Management: The Real Climb Limiter
Heat is the silent failure mode.
- Touch test: If you can’t keep a finger on the controller/motor for 2-3 seconds (≈70 °C), back off-drop assist, downshift, increase cadence.
- Summer rules: Hot day + low speed + tailwind = worst case. Keep air flowing, keep rpm up.
- Hardware add-ons (optional): Heatsinks, thermal pads, or ducting help, but correct gearing and cadence give bigger gains.
Ready-to-Use Setups
| Scenario | Motor | Front Ring / Cassette | Controller Targets | Riding Notes |
|---|---|---|---|---|
| City with short steep ramps | BBS02 | 34-36T / 11-42 | Batt A ~18-20; Start 10-15%; PAS current-based | Spin up early, brief throttle taps only |
| Loose/rocky trail climbs | BBSHD / M600 | 32-34T / 11-46-50 | Phase A moderate; Batt A 70-80%; soft ramps | Seated, smooth cadence; avoid wheelspin |
| Heavy cargo / long paved grades | M620 (G510) | 34-38T / 11-50 | Batt A 80-90% (watch temp); gentle PAS | Break the climb, monitor case temp |
| Big-wheel 29er, mixed terrain | BBSHD / M600 | 34-36T / 11-46 | Batt A ~80%; Start 10-20% | 29ers need lower gears-don’t be shy |
If any row still bogs below ~60 rpm on your steepest hill, drop another 2-4 teeth on the front ring or step up cassette range.
Common Mistakes (And What to Do Instead)
- “I’ll just add more current.”More amps ≠ free torque. It adds heat and chain shock. Fix gearing first.
- Holding throttle at walking speed for minutes.That’s a heat bath. Use gentle PAS and spin.
- Riding a huge chainring into steep grades.Big ring = low motor rpm = heat. Go smaller.
- Ignoring chainline and retention.Small ring + big cog = extreme angle. Keep chainline tidy; add a top guide if you drop chains.
- Not downshifting the moment cadence falls.That “one more second” is when temps skyrocket. Shift now.
60-Second Pre-Climb Checklist
- ✅ Front ring small enough for 70-100 rpm on the steepest bit
- ✅ Cassette has a big bailout cog (46/50T)
- ✅ PAS is current-based, start strength low
- ✅ Battery healthy; cables/connectors cool and tight
- ✅ Chainline OK, shifting crisp; guide fitted if you ride rough
- ✅ Hot day or long grade? Plan a mid-climb breather
Quick FAQ
My mid-drive overheats on hills-should I raise current to power through?
No. That makes heat worse. Lower gearing and keep cadence high; then tune current once temps are stable.
What front chainring should I buy for steep trails?
Start 32-34T (BBSHD/M600) or 30-34T (BBS02) with an 11-46/50 cassette. Adjust so you can spin 70-100 rpm on your worst hill.
PAS or throttle for long climbs?
Gentle PAS wins for efficiency and heat. Use short throttle blips only for obstacles.
Do I need a chain guide?
If you ride rough/loose climbs or see chain drops with small ring + big cog, a simple top guide is cheap insurance.